Picture Perfect Birthday Collection Artisan Blog Hop
Welcome to the 2018 Artisan Design Team March Blog Hop featuring the Picture Perfect Birthday Stamp Set and the Picture Perfect Designer Series Paper. You may have just arrived here from my sweet friend Kayla MacAulay from Australia. Did you love her creations? Her crafting projects are so festive!
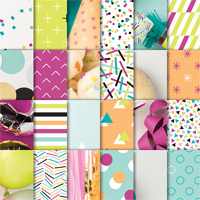
The Picture Perfect Party Suite is amazing. I love the vibrant colors this collection brings with photographic images and festive party designs. It’s easy to create birthday projects for your loved ones.
I started to create one project and couldn’t stop. This collection is so darling.

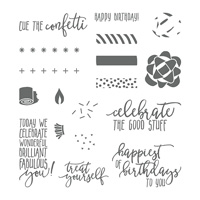
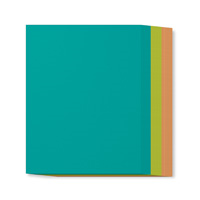
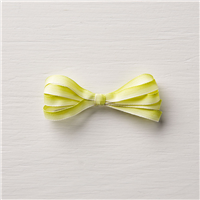
One of the highlights in the Picture Perfect Birthday Stamp Set is the beautiful font that were created for the greetings. This stamp set comes with 6 different greetings. I used 4 of them in my projects today. I also used the bow in my white card. The images were stamped with the two step stamp technique. It creates a 3D effect to the bow. The Island Indigo and the Lemon lime Twist 1/4″ Ombre Ribbon were also used. They are not part of the Picture Perfect Party Suite but they coordinate with the Picture Perfect Party 6×6 Designer Series Paper.

Instructions for the Whisper White Birthday Card:
- Cut a 4 ¼ x 11”piece of Whisper White Cardstock and score at 5 ½”.
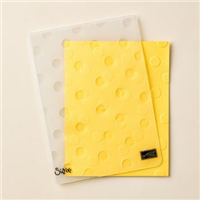
- Cut a 4 x 5 ¼” piece of Whisper White Cardstock and emboss with the Polka Dot Basics Textured Embossing Folder.
- Layer on top of your card base.
- Cut a 3 x 4” piece of DSP and adhere to your card.
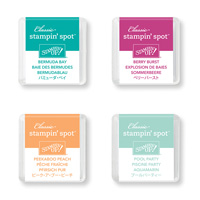
- Use an Aqua painter brush to stain your Delicate White Doilies with Lemon Lime Twist and Bermuda Bay Ink.
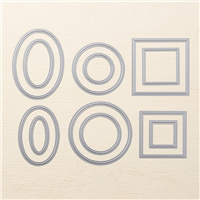
- Stamp the bows with Bermuda Bay ink as well as the greeting with Basic Black Archival Ink onto a circle piece of cardstock from the Stitched Shapes Framelits Dies.
- Add Lemon Lime Twist and Island Indigo Ombre Ribbons as well as Iridescent sequins to embellish your card.

Instructions for the gift bag:
- Create this bag using the Mini Treat Bag Thinlits Dies and the Picture Perfect Party 6″x6″ Designer Series Paper
- Wrap a 1 inch designer series paper belly band around the mini treat bag
- Attach a piece of Lemon lime Twist 1/4″ Ombre Ribbon around the belly band and tie a bow
- Stamp in Archival Basic Black ink the “Celebrate” greeting onto a piece of whisper white cardstock that was cut with the square Stitched Shapes Framelits Dies.
- Embellish with Irisdescent sequins
- Add the Sweet Soiree Shreddie in whisper white in your gift bag.
Instructions for the pull out card:
- Cut a 5 ½ x 11” piece of whisper white cardstock.
- Score at ½, 4 and 7 ½ inches and fold.
- Cut a 3 ¼ x 5 ¼” piece of DSP and adhere to the cover of the card.
- With the 1 3/8” circle punch, punch half a circle at the top of your card.
- Cut a 3 x 4 ¾” piece of soft sky cardstock for the cover of your card.
- Cut a 2 ¾ x 4 ½ inches piece of Picture Perfect Party DSP ( I used the candles) and adhere to the soft sky piece of cardstock.
- Wrap a piece of Island Indigo Ombre Ribbon around this layer.
- Stamp the greeting “Happy Birthday” from the Picture Perfect Birthday Stamp Set with Basic Black Archival ink on a piece of whisper white cardstock.
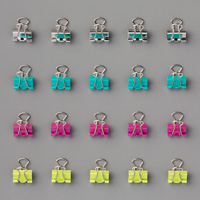
- Clip the greeting with the Birthday Mini Binder Clip onto the ribbon.
For the insert:
- Cut a 3 ¼ x 5 ½” piece of soft sky cardstock.
- Cut a 3 x 5 ¼” piece of whisper white cardstock and adhere onto the soft sky cardstock.
- Stamp the greeting “Treat Yourself” onto the insert with Basic Black Archival Ink.
- Punch out a DSP circle with the 1 3/8” circle punch and fold at the top of the insert.
- Add ombre ribbons to embellish as well as the sequins.

Next on the hop is my lovely friend Lauren Alarid from the United States. Lauren always has the most amazing colourful projects. I cannot wait to see what she created today. Click on the Blog Badge below to get to her blog.

If you live in Canada, I would love to be your demonstrator! Click on the supply list below to order any of the items. I’ve also added the stamp set codes for you my French Customers. Purchase the items below to earn FREE Sale-A-Bration Products. And if you are from another country, you can still take a glimpse of the products listed and shop with a demonstrator near you. Happy Stamping!
Hugs, Kim xo
2018 Artisan Design Team Blog Hop


Kim, your blog post is perfectly details but easy to read!!! Love your projects and love the softness you brought to the paper!
thank you Cathy
Such a great selection of projects – the perfect birthday set! Love them all x
thank you Emma:)
Kim!!! These projects are fabulous! I love the DSP in the apothecary candy jar. Such a fun way to show case the paper. I must say, nothing “wonky” at all about these. 😉
thank you Charlet! my favourite jar:)
Kim! These are all just so gorgeous and so lovely when done in “your style”. I love what you did with the treat jar-stunning projects all!
thank you Lauren. The jar contains surprise candies 🙂
Gorgeous!! I love the touch of sponging you added to your sentiment. That envelope slider card is cute and clever. Love it!
thanks Jennifer. These slider cards are so fun to make.
This all just looks amazing! What a super cute jar! This is all so perfect, love it!!
thank you Linda!
I wish I had a birthday now!
This is all so perfect and beautiful!
XOXO
thank you Sylwia. I adore your birthday in a box.
Kim, I love the way you focused on the softer colors of this DSP. Your projects are beautiful. I need that candy dish!
thank you Connie! isn’t that candy dish adorable?
These are so cool!
I love what you have done with colouring the doilies, that looks great!
thank you Kayla! so fun
What beautiful creations Kim, and I love that you include instructions too.x
Super beau Kim, je sais maintenant quoi faire avec le reste de ces papiers design. Merci et bravo!
Merci Sylvie! C’est vraiment gentil. Je suis contente que tu utiliseras la collection de papiers:)
These are beautiful!
I love the way you have coloured those beautiful doilies. That looks great & what a cute gift bag! xx
I love your stampin’ style, Kim and I can’t wait to see more of your Artisan projects this year!
Thank you Elizabeth! Your comment means the world❤️