Stampin’up!’s Party Banner Dies For A DIY Bag
Hello My Crafty Friends, Bonjour!
Happy Saturday! We are enjoying the warm weather here in Ontario Canada. It’s almost too warm for our puppy to be outside. So she is a little bit sad that we are keeping her indoors. I can’t believe it’s almost mid July… I’m so excited that my crafting stuff and furniture from Regina, Saskatchewan are getting packed on Monday, loaded on Tuesday and should be back home in Ontario by the end of July. It’s been challenging to have stuff in both houses. Finally, everything will be under one roof. I will miss the friends we have made in Regina as well as so many perks from this beautiful city.
This week, I am featuring a couple projects with Stampin’ Up! Make a Memory Scrapbooking Kit. I really wanted to show you the versatility of this kit.
Creative Possibilities:
• Create a mini-album, memory book, or expand into full 12” x 12” layouts using the kit as a starter
• Use elements for card making, tags, or memory keeping in planners
• Perfect for gift-giving: make a memory album for weddings, babies, graduations, or milestones
You can catch the replays below:
Day 3: DIY Bag with the Party Banner Dies
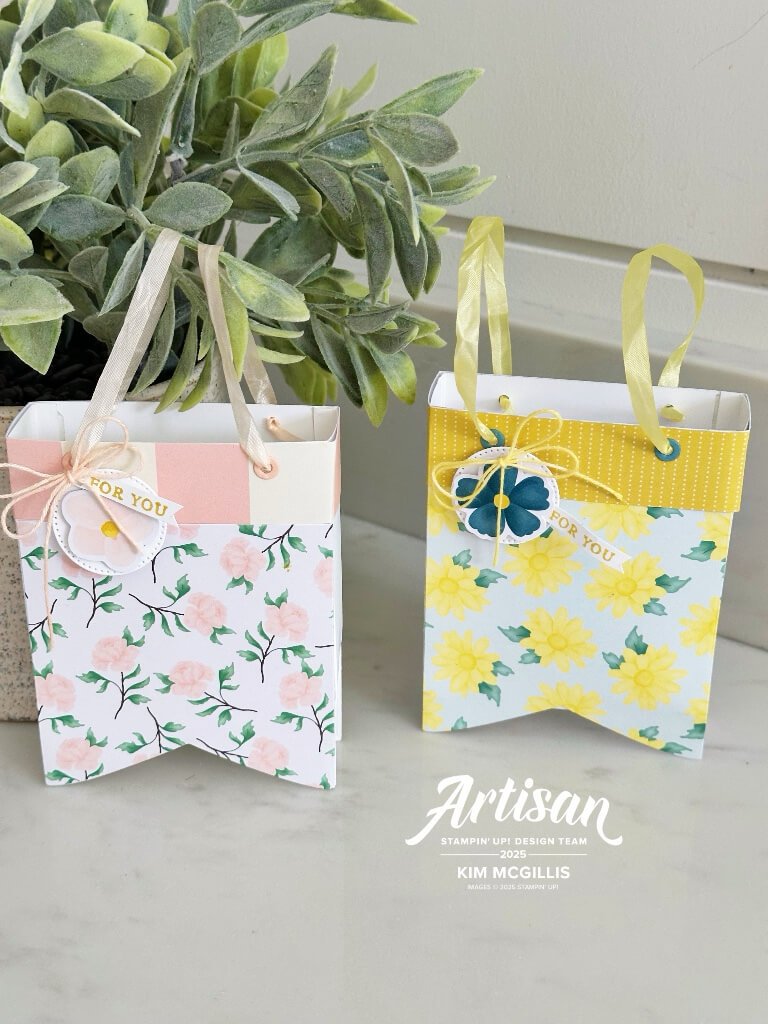
What is great about the Party Banner Dies is that you can make this box/bag in lots of different sizes… The size that I made is perfect for a treat or gift card. I also love that my size of the bag only needed a strip of 1 1/2″ x 11″ cardstock…
Bag #1: Team Petal Pink
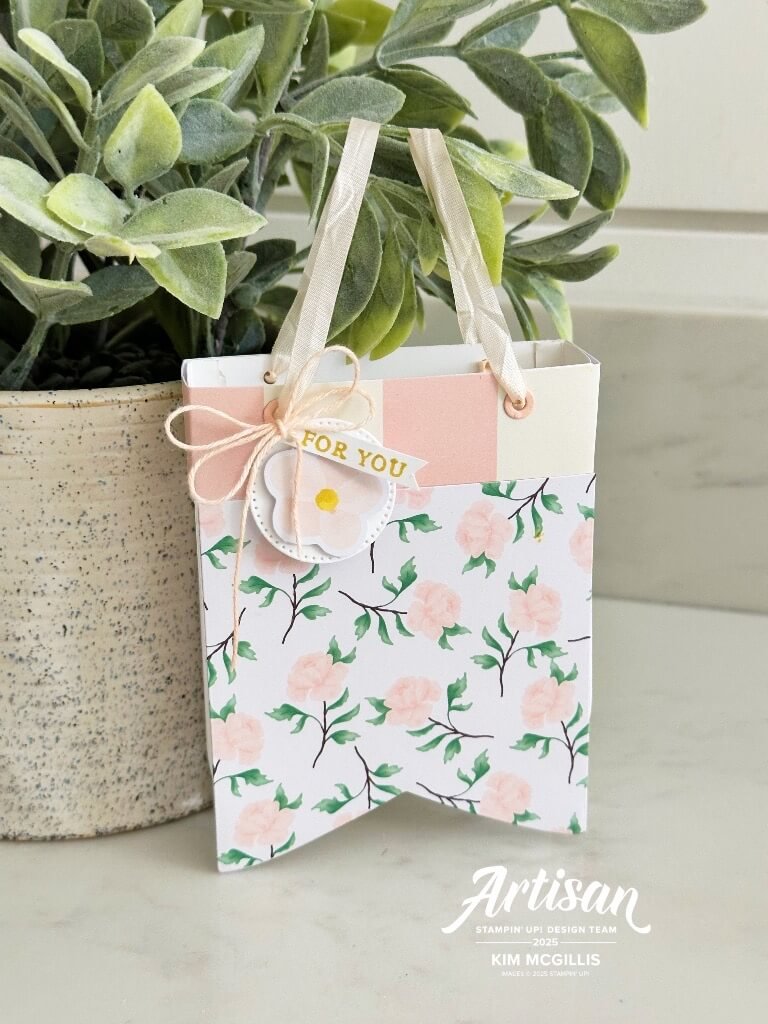
Mini Treat Bag with Party Banner Dies
Supplies:
• Stampin’ Up! Party Banner Dies (any symmetrical shape works best)
• Designer Series Paper or cardstock
• Scoring tool or bone folder
• Adhesive (Tear & Tape or Stampin’ Seal+)
• Ribbon or twine (optional)
• Hole punch (optional)
Bag #2: Team Darling Duckling
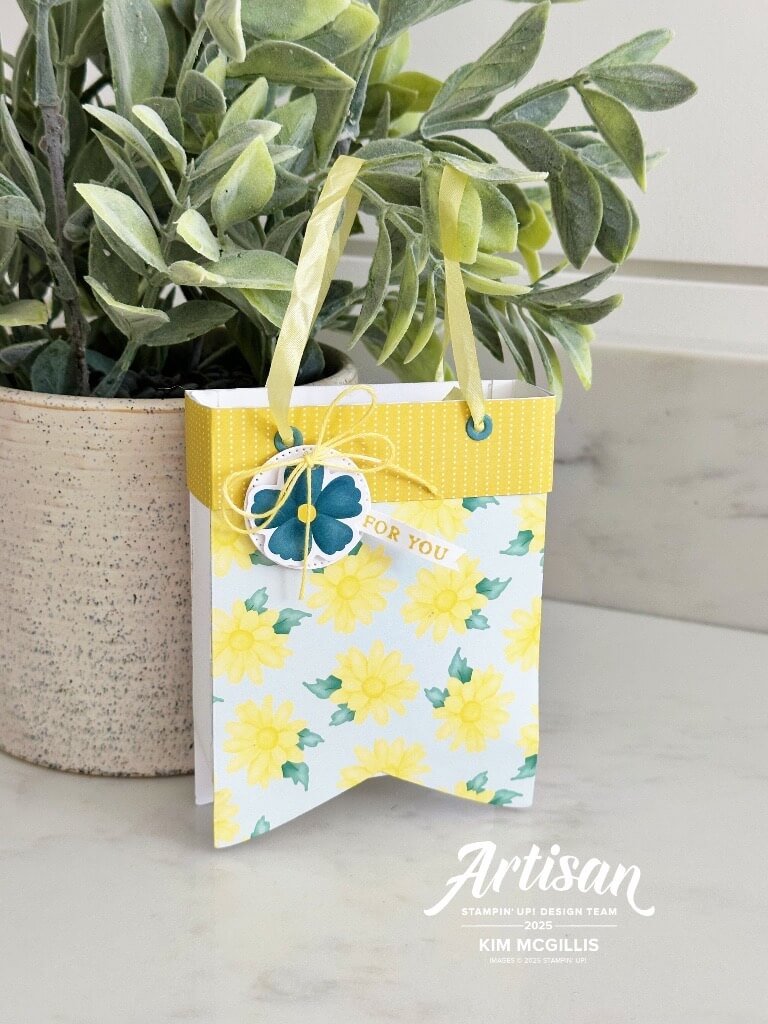
Instructions:
-
- Die Cut Two Banners: Choose a banner die (same size for front and back). Die cut two identical pieces.
- Score Cardstock: Score a 1 1/2″ x 11″ piece of cardstock about 1/4″ or 1/2″ the left and right sides on the long side
- Assemble the Bag: Apply strong adhesive to the side flaps of the cardstock. Attach them to both banners. Adhere the sides together to form the bag.
- Finishing Touches: Punch holes in the assembled banner box/bag and add ribbon to close.
I apologize in advance. Facebook has not been my friend this week.
Catch the Facebook Live Replay HERE
Products that I used are listed below in my store. – Make sure you are shopping with Kim McGillis, that’s me:)
Hugs, Kim xo
CARDS BY MAIL OFFER:
Week of July 7th to July 13th: Order by Sunday, July 13th at midnight a $60 order (before shipping and taxes) in my Online Store and you will receive a FREE Cards by Mail Class Kit. ***can be mailed anywhere in Canada at no additional fees. (no more Hostess Code Required) Just make sure you are shopping with me.
BONUS FOR JULY: Order for $65 in my store and get for FREE the Global Ink Collective Painterly Pears Tutorials. (12 ideas Featuring the collection)
Use this link to order (make sure you are shopping with Kim McGillis) : https://www.stampinup.ca/?demoid=2006500
If your order is $75 or more (before shipping and taxes). I will also include a bonus product in your class kit (like embellishments, ribbon, designer series paper).
Join My Team: https://www.stampinup.ca/join?demoid=2006500
Two-Tone Cardstock Flash Sale Is Over but you can still join my Project Share At Sale Price.
Fill out the form HERE, spaces are limited.


